|
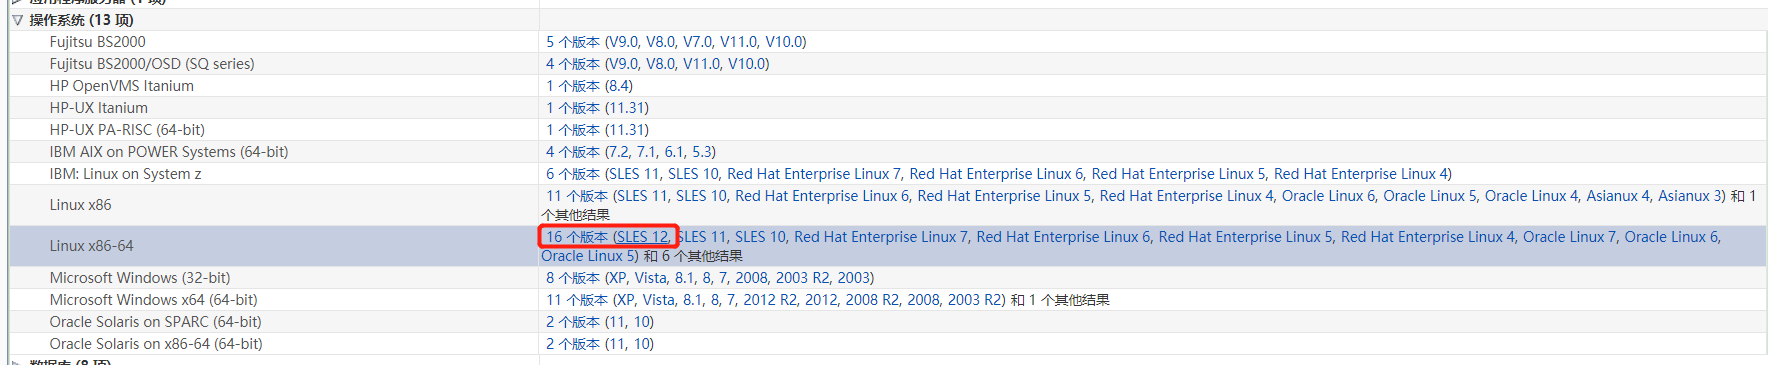
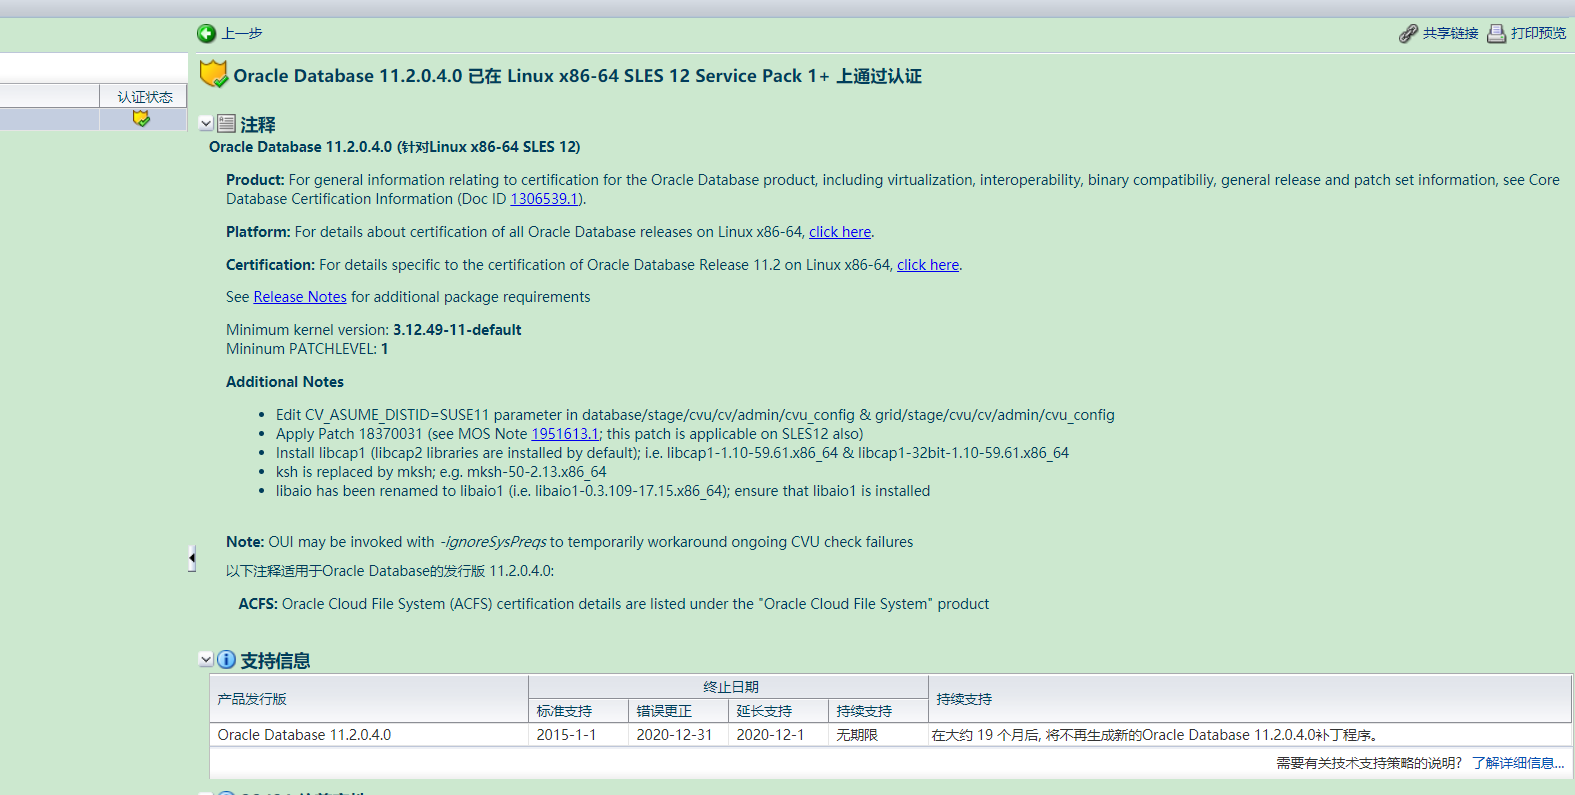
oracle 11.2.0.4的官方文档认证了suse 12 sp1,但sp3并未做认证

如要在sp3上安装,除了常规的linux上安装外,其他不同点参考如下步骤:
1 服务管理
/usr/sbin/rc*
systemctl list-unit-files|grep -i firewall
#修改主机名
hostnamectl set-hostname suse12
#禁用一些服务
systemctl disable bluetooth.service
systemctl disable dbus-org.opensuse.Network.DHCP6.service
systemctl disable wickedd-dhcp6.service
#关闭防火墙
linux-6x6d:~ # systemctl stop SuSEfirewall2.service
linux-6x6d:~ # systemctl list-unit-files|grep -i firewall
SuSEfirewall2.service enabled
SuSEfirewall2_init.service enabled
SuSEfirewall2_setup.service enabled
linux-6x6d:~ # systemctl disable SuSEfirewall2.service
2 启动管理
suse 取消/etc/inittab(CENTOS 7保留了这个文件,写了说明)
# multi-user.target: analogous to runlevel 3
# graphical.target: analogous to runlevel 5
查看运行模式:
linux-6x6d:~ # systemctl get-default
graphical.target
linux-6x6d:~ # runlevel
N 5
修改启动模式
linux-6x6d:~ # systemctl set-default multi-user.target
Removed symlink /etc/systemd/system/default.target.
Created symlink from /etc/systemd/system/default.target to /usr/lib/systemd/system/multi-user.target
#改成runlevel 3
systemctl set-default multi-user.target
systemctl set-default graphical.target
或者
修改文件/boot/grub2/grub.cfg ,在133行左右,修改自启动模式:
kernel /boot/vmlinuz-3.7.10-1.11-desktop root=/dev/disk/by-uuid/e897cb88-948a-4d13-8f79-06cc03d3d5cd devfs=mount,dall resume=/dev/disk/by-id/ata-WDC_WD1600AAJS-22WAA0_WD-WCAS24704151-part6 splash=silent quiet showopts vga=0x317 init 3
3调整分辨率
修改文件/boot/grub2/grub.cfg ,在133行左右,图中位置添加 vga=0x365,保存后推出,重启可将系统分辨率修改为1024*768,还需调大用如下办法:
3.1 备份系统初始的配置文件:
linux-p71j:~ # cd /etc/X11/xorg.conf.d/
linux-p71j:/etc/X11/xorg.conf.d # cp 50-device.conf 50-device.conf.bak
linux-p71j:/etc/X11/xorg.conf.d # cp 50-screen.conf 50-screen.conf.bak
linux-p71j:/etc/X11/xorg.conf.d # cp 50-monitor.conf 50-monitor.conf.bak
3.2 在50-device.conf文件中添加如下内容:
Section "Device"
  Identifier "Default Device"
  Driver "vesa"
EndSection
3.3 在50-screen.conf文件中添加如下内容:
Section "Screen"
  Identifier "Default Screen"
  Device "Default Device"
  Monitor "Default Monitor"
EndSection
3.4 在50-monitor.conf文件中添加如下内容:
Section "Monitor"
  Identifier "Default Monitor"
HorizSync 28-85
VertRefresh 50-100
Option "DPMS" "off"
EndSection
4 安装软件包
rpm -q --qf ‘%{NAME}-%{VERSION}-%{RELEASE} (%{ARCH})n‘ binutils
gcc
gcc48
glibc
glibc-32bit
glibc-devel
glibc-devel-32bit
libaio1
libaio-devel
libcap1
libstdc++48-devel
libstdc++48-devel-32bit
libstdc++6
libstdc++6-32bit
libstdc++-devel
libstdc++-devel-32bit
libgcc_s1
libgcc_s1-32bit
mksh-50f
make
sysstat
xorg-x11-driver-video
xorg-x11-server
xorg-x11
xorg-x11-Xvnc
xorg-x11-fonts-core
xorg-x11
xorg-x11-server-extra
xorg-x11-libs
xorg-x11-fonts |grep -i "not installed"|awk ‘{print $2}‘|xargs zypper install -y
5 更改hosts
cat /etc/hosts
192.168.56.105 suse12
127.0.0.1 localhost
6 安装86%会报错
%86时出现报错 Error in invoking target ‘agent nmhs‘ of makefile
解决方案
在makefile中添加链接libnnz11库的参数
修改$ORACLE_HOME/sysman/lib/ins_emagent.mk,将
$(MK_EMAGENT_NMECTL)修改为:$(MK_EMAGENT_NMECTL) -lnnz11
建议修改前备份原始文件
[[email?protected] ~]$ cd $ORACLE_HOME/sysman/lib
[[email?protected] lib]$ cp ins_emagent.mk ins_emagent.mk.bak
[[email?protected] lib]$ vi ins_emagent.mk
进入vi编辑器后 命令模式输入/NMECTL 进行查找,快速定位要修改的行
在后面追加参数-lnnz11 第一个是字母l 后面两个是数字1
7 安装samples
/app/oracle/product/11.2.0/dbhome_1/demo/schema/mk_plug.sql
官方参考参见:docs.oracle.com/cd/E11882_01/install.112/e24326/toc.htm#CEGHBFHB
(编辑:宣城站长网)
【声明】本站内容均来自网络,其相关言论仅代表作者个人观点,不代表本站立场。若无意侵犯到您的权利,请及时与联系站长删除相关内容!
|